
Complete Guide to Installing the Leader Weapon Mounting System
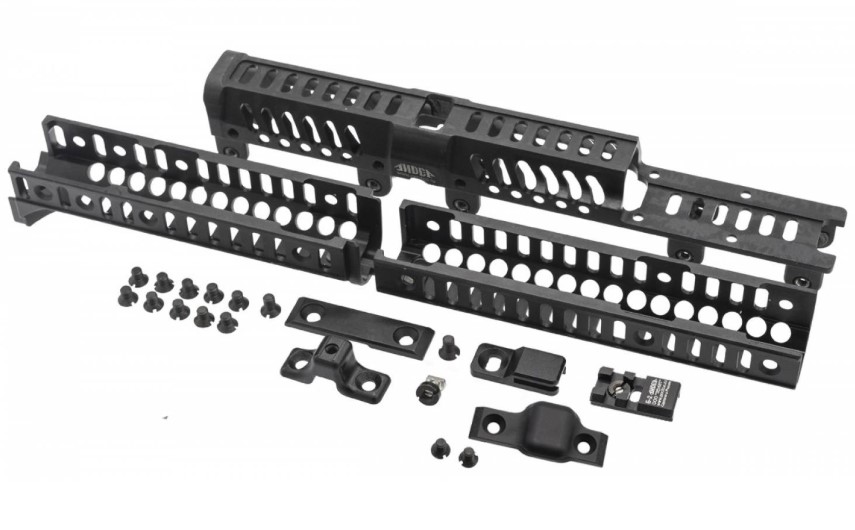
The “Leader” kit is designed to provide a secure and stable mounting platform for compatible weapon systems. Proper installation is essential to ensure reliability, durability, and shooting accuracy.
Please read the entire instruction carefully before beginning installation.
Step-by-Step Installation
1. Perform an Incomplete Disassembly
Before installing the kit:
- Remove the standard fore-end.
- Remove the gas outlet pipe.
- Remove the standard trim from the gas outlet pipe.
Make sure the weapon is unloaded and safe before starting any work.
2. Install the B-10L Bracket
Replace the standard fore-end with the B-10L bracket.
2.1 Install Standard Fittings on B-10L
- Install the standard fittings onto the B-10L.
- The protruding element on the forearm must fit into the ramrod hole in the fitting.
- If there is no ramrod hole in the standard fitting (for example, as in TG2), the protruding element on the forearm must be sawn off.
Do not cut anything else.
If there is a ramrod hole in the fitting, do not remove the protruding element.
2.2 Align the Forearm
- Align the free end of the B-10L forearm with the groove of the receiver.
2.3 Install the Forearm into the Receiver
- Place a wooden or metal spacer onto the swivel washer.
- Using a hammer, drive the B-10L forearm into the receiver.
Important:
- Impacts are allowed only on the spacer.
- The fore-end fits tightly. Do not file or modify it.
- The rigidity of the forearm installation directly affects sight stability and shooting accuracy.
2.4 Secure the Locking Lever
- Close the locking lever on the trunnion/forging.
3. Install the Gas Pipe
- Install the vent (gas) pipe.
- Lower and secure the gas pipe connector.
4. Install the B-31 Leader Bracket
Mount the B-31 Leader bracket according to its designated position.
5. Install the DL Leader Bracket
Install the DL Leader bracket into its proper mounting location.
6. Side Connection Using the Leader Tie
- Connect the B-10L and DL Leader brackets from the side using the Leader tie.
- Use M5×9 screws (longer) for the tie connection.
- Use M5×7 screws (shorter) for all other connection points between:
- B-10L
- B-31 Leader
- DL Leader
Ensure all screws are securely tightened.
7. Bottom Connection Using the Leader Stop
- Connect B-10L and DL Leader from below using the Leader stop.
- Secure it with M5×7 screws (shorter).
8. Install the Leader Hook
- Install the Leader hook as shown in the instruction images.
- If the hook fits tightly, use a hammer and spacer to install it carefully.
Final Check
- Ensure all screws are tightened.
- Verify that all components are firmly seated.
- Confirm that the gas system operates correctly.
- Check sight alignment and stability.
Proper installation guarantees maximum reliability, structural rigidity, and shooting accuracy.
Zenitco Sport-1 Handguard Kit - CNC Aluminum AK Handguard System (Basis, 3 Sides)
Zenitco Sport-1 Handguard Kit - Complete Basis Handguard System (3 Sides) CNC D16T Aluminum | Bas..
$599.00

Leader Hand Stopper by Zenitco
Leader Hand Stopper by Zenitco is a compact and durable accessory designed specifically for the Lead..
$39.00

Leader Insert Rail by Zenitco
Leader Insert Rail by Zenitco is an ergonomic front-facing accessory rail designed to be mounted on ..
$149.00

Leader-S Kit by Zenitco
Leader S Kit by Zenitco is a full-featured upgrade system for AK-based rifles with barrels not short..
$799.00

Tags Leader Kit, B-10L, B-31 Leader, DL Leader, Installation Guide, Tactical Accessories, Mounting System, Weapon Upgrade